In case you hadn’t noticed…
October 23, 2009
I’VE MOVED!!!!!!
Kitch Potato was a good start to something great…come see me at my new home:
Busy-Day Cake
May 26, 2009
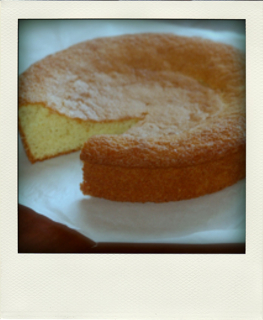
As I become more comfortable in the kitchen, I find myself increasingly enchanted by Southern cookery. Although I was fed well growing up (thanks mother), our meals were something one might consider “new-Southern”, a.k.a “casserole cooking.” Canned cream of mushroom was never a pantry’s reach away, alongside the infamous blue box, jarred tomato sauce and Stouffer’s lasagna. Our weekly dinner menu was usually a rotation of meatloaf, spaghetti, shepherd’s pie and beef stroganoff; all delicious things that will always remain in my repertoire. But not by any means Southern.
I am however, deeply influenced by both my grandmothers’ cooking. Nanna Dozier was often found whipping up chicken and dumplings from scratch, while Nanna Hagler always had a pot of spicy gumbo waiting patiently on the stovetop for hungry grandchildren to come gobble it down. It is these memories that nudge me to not only revive these recipes from the past, but to pass them along to future generations.
As I have begun to study Southern cuisine more diligently, I have discovered the wonderful works of Edna Lewis, better known as the Grande Dame of Southern cooking. Her writings have been essential to the preservation of an almost lost art. And although I am not the first person to discover her beautifully written recipes, I know later is better than never.
When I first read the words “Busy-Day Cake” in A Taste of Country Cooking, I was immediately spell-bound. How incredible is the idea of always having a freshly baked cake waiting in the kitchen on-the-ready, luring in unsuspecting passerby’s with the lingering aroma of spicy-sweet nutmeg. It is a tradition I will now strive for in my own house, hopefully not an impossibility but rather an attainable goal.
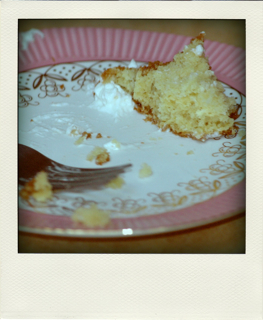
This cake honors its name — not too sweet and yielding a thick, almost cornbread-like crumb. Use the freshest ingredients available to you, as Edna would have. And put away the stand mixer for once and get that wooden spoon moving. The cake will taste better that way, as things made with love have tendency to do.
BUSY-DAY CAKE
Source: Adapted from A Taste of Country Cooking
- 8 tablespoons butter (1 stick), at room temperature
- 1 1/4 cups granulated sugar
- 3 large eggs
- 2 cups sifted all-purpose flour
- 1/4 teaspoon kosher salt
- 1 1/2 teaspoons pure vanilla extract
- 2 teaspoons baking powder
- 1/4 teaspoon freshly grated nutmeg
- 1/2 cup whole milk
Preheat the oven to 375°F. Butter and flour a 10-inch square and 2-inch deep cake pan or 9-inch springform pan, set aside. (I used an 8-inch round cake pan).
With a large wooden spoon, beat the butter and sugar in the bowl until light and fluffy. Add the eggs, one at a time, beating to incorporate after each addition.
In a large bowl, blend the butter and sugar by hand until it is light and fluffy. Add the eggs, one by one, beating the batter with a wooden spoon after each addition. Stir in the vanilla.
In a medium bowl, sift together the flour, baking powder, salt and nutmeg. Alternate adding the flour mixture and the milk, starting with 1/2 cup of flour and 1/3 of the milk, and ending with the remaining flour. Stir well after each addition.
Spoon the batter into the cake pan, and smooth the top with a spatula. Bake about 30 minutes or until a toothpick inserted in the cake comes out clean. No need to ice, just serve warm with a glass of cold milk or freshly whipped cream.
Tacos con Carnitas
May 24, 2009
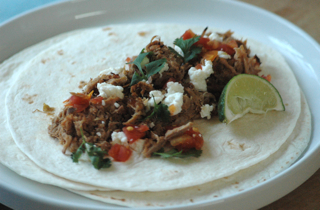
I live in the land of tacos. From Twittering taco trucks to family owned taquerias tucked into every seedy strip-mall from Venice to East L.A., SoCal is THE place to be if you want authentic Mexican food (well, besides Mexico). Growing up in Alabama, I wouldn’t have known authentic Mexican if it hit me with a stick. I thought Mexican food was either tacos, burritos or fajitas. Oh, and white queso dip. Thank God I have seen the light. These days I have a tough time choosing from tamales, sopitos, chilaquiles and enchiladas. Don’t even get me started on the number of salsas, moles and hot sauces to pick from. It’s enough to drive this girl to drinking. Margaritas that is. But one thing is for sure, when it comes to choosing tacos, Carnitas always win. What’s not to love about slow-roasted, melt-in-your-mouth pieces of pulled pork?
Despite my access to all these delicious authentic Mexican food options, sometimes this girl just likes to do things herself. I had Friday off (4 day weekend, whoot), so I decided to spend my day in the kitchen making my very own authentic Carnitas. They are actually quite simple to make, they just require a little bit of patience. Feel free to drink a 6 pack of Dos Equis while you wait. I found this makes the time pass much more quickly.
There is quite a bit of dispute as to the best way to make Carnitas, but I found this recipe from Farmstead, Inc. to be exemplary. After I pulled them from the oven, I spread the pork out over a baking sheet and broiled it for about 10 minutes. This gave the meat an amazing crunch to counter-balance the tenderness. Next time I might add a little liquid smoke to give it that fresh-off-the-grill flavor (I’m from Alabama … I can’t resist.) Oh yeah, this was even more incredible the next day, so I recommend making it ahead if you are serving it at a party.
TACOS CON CARNITAS
Adapted from: Farmstead, Inc. via The Boston Globe
- 1 small Spanish onion (skin intact), quartered
- 2 cloves garlic, halved
- 2 Roma tomatos, halved
- 1 jalapeno pepper, halved (seeds intact)
- 1 tablespoon vegetable oil
- 1/3 cup lemon or lime juice
- 5 sprigs fresh cilantro, leaves removed
- 1 tablespoon chili powder
- 1 teaspoon ground cumin
- 3 tablespoons olive oil
- Salt and black pepper, to taste
- 2 ½ pounds pork butt
- 2 cups chicken stock
- 1 tablespoon brown sugar
Set the oven at 400 degrees.
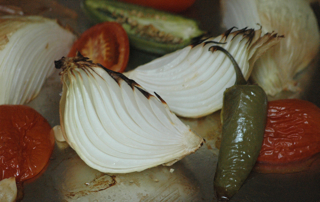
In large bowl, combine the onion, garlic, tomato, jalapeno, and vegetable oil. Toss well and spread evenly on a rimmed baking sheet. Roast the mixture for 15 minutes or until the onions and jalapenos are softened. Set aside to cool.
In a blender, combine the vegetables, lemon or lime juice, cilantro leaves, chili powder, and cumin. Puree the mixture. With the motor running, slowly drizzle in the olive oil. Add salt and pepper.
Thoroughly massage the pork butt with the vegetable sauce. Place it in gallon-sized zipper-lock bag. Pour remaining sauce over the pork. Refrigerate 8 hours or overnight, turning the bag twice. I marinated it for about 1 hour and it tasted great to me. I can only imagine how good it is if you marinate it overnight.
Set the oven at 300 degrees.
In a flameproof casserole, combine the pork and marinade. Add stock and bring to a boil. Cover and transfer to the oven. Cook the pork for 4 hours or until it shreds easily with fork. Remove meat from the pan and set aside until cool enough to handle. Strain the sauce through a fine-mesh strainer into a bowl.
Using 2 forks or your hands, finely shred the pork. Transfer it to a bowl. Slowly add enough of the sauce to the pork to make a thick stew-like consistency. Stir in the brown sugar. Taste for seasoning and add more salt and black pepper, if you like. I also added a good glug of hot sauce here. I won’t judge if you do it, too.
Spread pork over cookie sheet. Broil for approximately 10 minutes or until golden brown and crispy.
To serve: steam tortillas in microwave or wrap in foil and heat under the broiler. Serve with sides of diced tomatoes, crumbled queso fresco, minced shallots and fresh sprigs of cilantro. Drizzle with lime juice and enjoy! YIELDS 8 servings
Lookie, Lookie…I’ve got a Cookie
May 21, 2009
 Walter’s big 2-7 came and went with plenty of to-do. I’m a HUGE fan of birthdays — both other people’s and my own — and a firm believer in a multi-day celebration (I’ve been known to celebrate a little thing called Nealey-gras…and it’s awwwsome).
Thus the festivities began last Tuesday with an early surprise of Lakers vs. Rockets playoff tickets at Staples Center. Yes, I know I am the most amazing girlfriend ever. We braved 5:00 traffic on the I-10 in order to hit up the famous Philippe’s beforehand for some award-winning French Dips. We ate three. Not each, but trust me on this, three is a lot, even for us. Probably too much, but you only live once, right? If the night had ended there my life would have been complete. But lucky for us it didn’t (the night, not my life). The game was amazing despite our nose bleed seats, and the Lakers won by 40 points. Maybe Walt and I are their lucky charms? Doubt it.
On Saturday, our friend Garrett and I planned a “Walter hates his birthday” surprise party, since Walter well, hates his birthday. The only requirement was to come ready to pester him with high-fives and fist-pumps, and we’d supply the rest. The rest being a fully stocked liquor bar and tasty snacks made by yours truly. I spent the day trying my hardest not to spill the secret (this was tough, so very tough) and then mysteriously disappeared about an hour before “call time” to pull all of the details together at Garrett’s. In just one hour I pulled together Dixie Caviar, Pesto Pasta Salad, Magic Bars, and Jack’s to-die-for Coca Cola burgers, while Garrett decorated with cheesy birthday decor (you know, balloons, hats, streamers…the works). We lured him to Garrett’s with some sort of fib about watching the new fall “pilots” and grilling a Tenderloin. At the time it seemed to work, but in the end I’m not sure if Walt was actually surprised. At least he did a good job of making us feel like we had him fooled. Good boy.
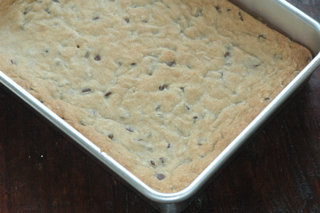
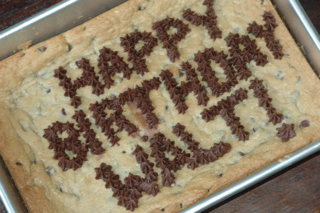
On Monday (the day before the big day), I set out to find a perfect cake recipe, since Walt had requested a Chocolate Chip Cookie Cake for the big day. Back South we grew up with cookie cakes from The Great American Cookie Co., but these days only homemade would do. I was a little timid in the kitchen due to the fact that I have been having a tough time with Chocolate Chip Cookies lately, but I brushed my nerves aside and set on my way. The dough was delicious (isn’t it always?)…but the cake? Well…it was even MORE delicious. It was chewy and sweet and moist and just as it should be. I topped it with Duncan Hines Classic Chocolate Frosting, since it is most like the Cookie Co. icing. I was in such a hurry to give Walt his cake that I raced through the letters — which is probably why they look so wild. Walt said he wouldn’t have it any other way. Next year I’ll try to slow down.
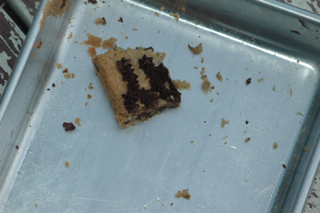
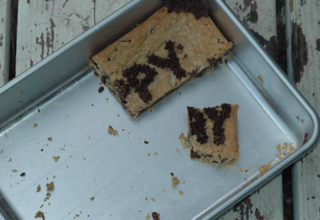
Yesterday was Walt’s actual birthday (FINALLY), and we celebrated by going to see The Allman Brothers at the Greek Theater. We gobbled down leftover cookie cake on the way there, chased down with Budlight in the can. Perfection. The show was amazing, but by the end of the night I was ready for sweet, sweet sleep. Turns out, birthday weeks are exhausting. But that doesn’t mean I’m not counting down until next year. Only 364 days to go.
CHOCOLATE CHIP COOKIE CAKE
Source: Recipezaar
- 1 cup butter
- 1/2 cup sugar
- 2/3 cup brown sugar
- 2 eggs
- 1 teaspoon vanilla
- 2 cups flour plus 4 tablespoons flour
- 1 teaspoon salt
- 1 teaspoon cream of tartar
- 1 teaspoon baking soda
Preheat oven to 350 degrees. Beat butter and sugars together. Add eggs and vanilla.
Mix flour, salt, baking soda, and cream of tartar in a separate bowl. Slowly add dry ingredients to the batter and mix until well blended. Stir in chocolate chips.
Spread dough into a 15 1/2 inch round pan (I used a 9 x 13 cake pan which worked perfectly). Bake for approx. 25 minutes. Frost, if desired. YIELDS 15 servings.
On Top of Spaghetti…
May 15, 2009
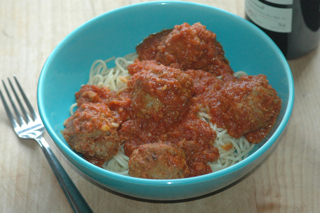
My love affair with the famous Rao’s Italian restaurant in New York began with a bottle of salad dressing. Balsamic Vinaigrette to be exact. I have a strange obsession with the stuff but had yet to find a grocery store brand even come to close to acceptable in my mind – until Rao’s, that is. After starting somewhat of a trend among my friends with this dressing, I decided to research this “Rao” person further. Alas, I quickly discovered that Rao’s was a famous restaurant in East Harlem (yep – that East Harlem). I also learned that their meatballs are some of the best this side of the Atlantic. Hmmm…I’m liking the sound of this place.
With only 8 tables and a laundry list of celebrity clientele, Rao’s is one of the most desirable Italian restaurants in NYC (and that’s saying something). Good luck ever getting a seat, though. You practically have to be the President to get in the door, and even that isn’t a guarantee. Good thing they published a cookbook so the “little people” could share in the fun.
I immediately had to try the meatballs, since this is their biggest claim to fame. This recipe didn’t disappoint, and I am proud to say that I have officially made my own homemade marina. Now if only I could make my own noodles… Soon, very soon.
Oh and by the way, the sauce is even more delicious the next day … We piled it into sourdough baguettes layered with fresh mozzarella slices for the most tasty of meatball subs.
RAO’S FAMOUS MEATBALLS, a.k.a Frankie’s Meatballs
Source: Rao’s Cookbook by Frank Pellegrino
- 1 pound ground lean beef
- ½ pound ground veal
- ½ pound ground pork
- 2 large eggs
- 1 cup freshly grated Pecorino Romano cheese
- 1 ½ tablespoons chopped Italian parsley
- ½ small garlic clove, peeled and minced, optional
- 2 cups bread crumbs (use the best quality Italian bread you can get your hands on)
- 2 cups lukewarm water
- Salt and freshly ground pepper to taste
- 1 cup fine-quality olive oil
- Cooked Pasta, (optional)
- Rao’s Marina (recipe below)
In a large bowl, combine beef and pork using your hands. Mince 1/2 clove garlic and add to meat mixture along with the eggs, cheese, and parsley; season generously with salt and pepper. Continue mixing with your hand until well combined. Add bread crumbs and mix well. Add water, 1 cup at a time, and continue mixing until mixture is quite moist.
Shape mixture into 2 1/2-to-3-inch balls. Heat oil in a large skillet over medium-high heat. Smash remaining clove of garlic with the back of a knife and add to skillet. Cook until lightly browned and fragrant, 1 to 2 minutes; remove with a slotted spoon and discard. Working in batches, add meatballs to skillet. Cook until browned and cooked through, turning, about 10 minutes. Drain on paper towels and serve immediately.
Meanwhile, bring marinara sauce to a boil in a large nonreactive saucepan. Reduce heat to a simmer and add meatball. Let meatballs cook in sauce about 20 minutes; serve immediately with pasta, if desired. YIELDS 14 to 18 meatballs.
RAO’S MARINARA
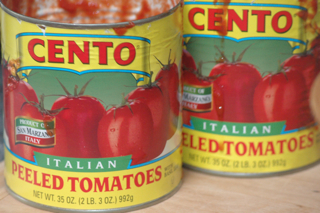
- 2 (28 ounce) cans imported Italian plum tomatoes with basil (preferably those labeled San Marzano)
- 1/4 cup fine-quality olive oil
- 2 ounces fatback or salt pork, optional (I actually fried up some bacon and used the grease, which worked just fine for me)
- 3 tablespoons minced onion
- 2 garlic cloves, peeled and minced
- Salt and pepper (to taste)
- 6 leaves fresh basil, torn, optional
- Pinch dried oregano
Remove tomatoes from the can, reserving the juice in which they are packed. Using your hands, crush the tomatoes, gently remove and discard the hard core from the stem end, and remove and discard any skin and tough membrane. Set aside.
Put oil in a large, nonreactive saucepan over medium-low heat. If using fatback, cut it into small pieces and add to the pan. Sauté for about 5 minutes or until all fat has been rendered. Remove and discard fatback.
Then add onion. Sauté for 3 minutes or until translucent and just beginning to brown. Stir in garlic and sauté for 30 seconds or until just softened. Stir in tomatoes, reserved juice, and salt. Raise heat, and bring to a boil. Immediately reduce heat to a very low simmer and cook for about 1 hour or until flavors have combined and sauce is slightly thickened. (If you prefer a thicker sauce, cook for an additional 15 minutes). I used an immersion blender to make the sauce smoother – to the liking of my bf. Yum.
Stir in basil, oregano, and pepper, and cook for an additional minute. Remove from heat and serve. YIELDS 7 cups
Spinach and Mushroom Enchiladas with Cilantro Cream Sauce
April 28, 2009
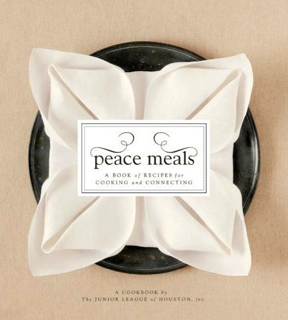
I have a cookbook addiction. No, make that an Amazon addiction. I order multiple (cook)books per week, and I love finding used copies for dangerously low prices. Some may call this a problem. I call it an education. My latest cookbook to arrive is a true beauty. Peace Meals from the Junior League of Houston is an exemplary work – miles and miles ahead of its junior league predecessors. The pictures are stunning, the recipes mouthwatering, and the message timeless. I finished it in one sitting and cannot wait to read it again, needless to say devour every recipe that fills its pages.
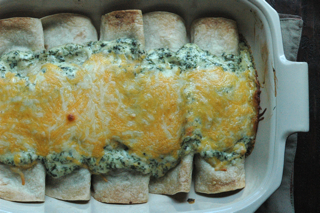
I couldn’t wait to try something from it, so when Walt happened to head to Long Beach for the Grand Prix last weekend, I figured I should spend my alone time making something that he usually wouldn’t eat (a.k.a. any type of meatless entree – a cardinal sin for a Southern boy). The recipe for Spinach and Mushroom Enchiladas with Cilantro Cream Sauce immediately caught my eye. I love anything with spinach and mushrooms, and I’ve never met a cream sauce I didn’t like. I spent the afternoon galavanting around the kitchen, making these at my leisure. You know, my kind of cooking. Sometimes a little quiet time is exactly what this girl needs.
These enchiladas weren’t exactly quick or clean for that matter, but they were definitely tasty (especially the Cilantro Cream Sauce – which would be incredible piled on all sorts of things such as poached eggs, roasted chicken or grilled fish), but it was a shame not to have anyone to share them with. Half the fun of cooking is to sit down and enjoy food with the people you love. Good thing Walt arrived home hungry from a day at the races. I re-heated a few in the oven, and you know what – he ate every bite and then some. And he helped me do the dishes!
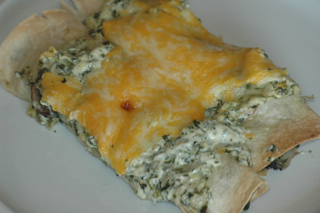
SPINACH AND MUSHROOM ENCHILADAS WITH CILANTRO CREAM SAUCE
Source: Peace Meals, by the Junior League of Houston
For the Cilantro Cream Sauce
- 3 cups heavy cream
- 1/4 teaspoon cayenne pepper
- 1 1/2 teaspoons coarse salt
- 3 cups chopped cilantro leaves
- 5 teaspoons cornstarch dissolved in 5 teaspoons cold water
For the Enchiladas
- 1 teaspoon butter
- 1/2 large onion, diced
- 8 ounces fresh button mushrooms, stemmed and quartered
- 20 ounces frozen chopped spinach, cooked
- 1/2 cup stale bread crumbs
- 1 teaspoon white pepper
- 1/8 teaspoon nutmeg
- 1/4 teaspoon chile powder
- 1 egg
- Coarse salt
- 2 cups shredded Mexican cheese blend, divided
- 10 flour tortillas
Preheat the oven to 350 degrees.
Mix together the cream, cayenne, salt, cilantro and the dissolved cornstarch in a 2-quart saucepan over medium heat. Cook and stir until thickened, about 10 to 15 minutes.
Meanwhile, melt the butter in a skillet over medium heat. Add the onions and mushrooms, and sauté until the onions are transparent. Remove from heat and set aside. Squeeze the excess water out of the cooked spinach. Place the spinach, bread crumbs, white pepper, nutmeg, chile powder and egg in a food processor and pulse until blended thoroughly; season with salt. Transfer the spinach mixture to a large mixing bowl and stir in the reserved onion-mushroom mixture and 1 cup of the cheese.
Spoon about 1/4 cup of the filling onto each flour tortilla roll up and place seam side down in a 9-by-13-inch baking dish. Pour the cilantro cream sauce evenly over the enchiladas and sprinkle with the remaining cheese. Bake for 30 minutes, or until brown and bubbly. SERVES 4 to 6.
Give me a kiss…
April 21, 2009
I had the luxury of spending a summer studying abroad in Florence, Italy while in college. Along with about 50,000 other American girls, my best friend Jennifer and I packed up our travelers checks and Teva’s and headed for la dolce vita. My good intentions were to bide my time mastering both the beautiful Italian language as well as the stunning art and architecture. Well, my language skills may still be lacking, and I don’t really remember much about Brunelleschi, but there is one thing I did master — the cuisine.
While my fellow classmates were out spending their parents’ hard-earned money on Dolce & Gabbana, I was spending mine on food. A fette biscottate and caffe e latte started each day; a pizzetta piled high with the freshest mozzarella, tomatoes and tuna drizzled in rich olive oil and sprinkled with sea salt made a perfect lunch on the go; and loads and loads of homemade tagliatelle, paparadelle and gnocchi swimming in bright tomato sauce closed out our evenings. But the food I remember most is Italy’s famous gelato.
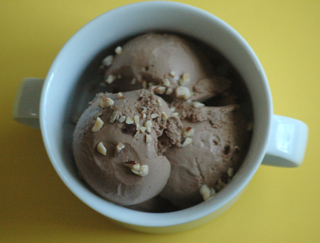
Summertime in Florence reaches sweltering temperatures, not only from the bright Tuscan sun but because the thick stone walls of the buildings were designed to trap heat during the harsh winters. Since it is a walking city, Jennifer and I often found ourselves on the verge of heat stroke after trolling from museum to museum. Looking for somewhere to quench our thirst, we quickly discovered a little gelato stand near our flat. The owner was the most adorable elderly gentleman, and his eyes would light up when we first approached, and he was always generous with samples. I will never forget the moment when he handed me a spoon dripping in chocolate-hazelnut gelato. “Here, a kiss for you,” he said sweetly. I blushed; those Italians really do know how to turn on the charm. It turns out that chocolate-hazelnut gelato is called bacio, which means kiss in Italian. What a perfect name for a perfect dessert.
Here is a FANTASTIC replication of bacio… now all that’s missing is the Arno.
CHOCOLATE-HAZELNUT GELATO
Source: Giada De Laurentiis
- 2 cups whole milk
- 1 cup heavy cream
- 1/2 cup sugar, plus 1/4 cup
- 4 egg yolks
- 1/2 teaspoon vanilla extract
- 1/2 cup chocolate-hazelnut spread (recommended: Nutella)
- 1/2 cup toasted hazelnuts, crushed, for garnish
In a saucepan combine the milk, cream, and 1/2 cup sugar over medium heat. Cook until the sugar dissolves, about 5 minutes.
Meanwhile, in a medium bowl whip the egg yolks with the remaining sugar using an electric mixer until the eggs have become thick and pale yellow, about 4 minutes. Pour 1/2 cup of the warm milk and cream mixture into the egg mixture and stir. Add this mixture back into the saucepan. Cook over very low heat, stirring constantly, until the mixture becomes thick enough to coat the back of a wooden spoon, about 7 to 10 minutes.
Place a strainer over a medium bowl and pour the warm custard mixture through the strainer. Stir in the vanilla and hazelnut spread until it dissolves. Chill mixture completely before pouring into an ice cream maker and follow manufacturer’s instructions to freeze. To serve, scoop gelato into serving bowls and top with hazelnuts. (YIELDS 4 CUPS – next time I would double the recipe. It is just sooo good!)
A Homemade Easter
April 14, 2009
Sunday, April 12, 2009:
SPRING SANGRIA
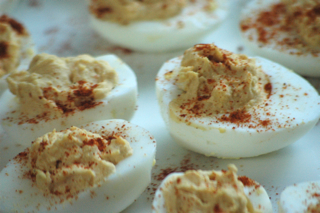
DIVINE DEVILED EGGS
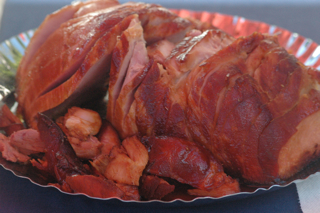
BAKED HAM WITH BOURBON GLAZE
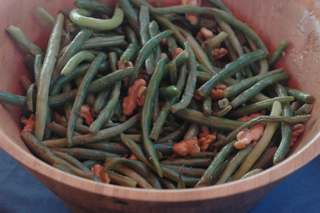
HARICOTS VERTS WITH WALNUTS & WALNUT OIL
PURPLE PURUVIAN SMASHED POTATOES
ALICE WATERS’ STRAWBERRY SHORTCAKES

When I was a little girl, Easter morning always meant Sunday best: a dainty new frock with lots of ruffles, thick white tights (usually with a couple of runs straight up the shins), and shiny black patent leather mary-janes affixed with tiny bows. Once the Easter bunny chaos subsided and I was fully dressed, my mother would unpin my hair from a mass of pink styrofoam curlers and I would flip my head over and shake, shake, shake. Then she would carefully tie a pink satin ribbon around my head, cocked to the left just so, add a dab of rosy lip gloss and give my cheeks a good pinch. At church, I would sit ever so still in the pew, shoulders back, as to not wrinkle my special dress or mess up my curls. Jesus must have been so proud.
Early-afternoon was spent at the Saugahatchee Country Club for the infamous neighborhood Easter egg hunt – a combination of screaming, laughter, and mild hysteria. My sisters and I would track each other closely, careful to never lose sight, making sure that none us had more eggs than the other. The grown-ups would sip Bloody Mary’s and gossip in the shade, looming close in case a child should discover the golden egg. After all the bright plastic eggs were accounted for, everyone made their way inside for a festive Southern buffet. Blessings were said, cocktails were refreshed and lunch was served. Fried catfish, medium-rare roast beef, and brown-sugar glazed ham were the stars of the show, served alongside the best supportings: bubbly mac & cheese, crispy fried okra, creamy broccoli casserole, and sweet corn-on-the-cob. Of course, the meal wasn’t complete without homemade peach cobbler, chocolate cream pie, and ice cream sundaes piled high with Reddi-wip, maraschino cherries and multi-colored sprinkles. And don’t forget a Shirley Temple to wash it all down.
Long gone are the days of our prized wicker Easter baskets spilling over with Peeps and Mini Cadbury eggs. My sisters and I have since spread far and wide, while my parents remain back in Alabama. I can no longer make the cross country trek home for all of the holidays, so I have created my own “family” here in Los Angeles to celebrate with. Some things are a little different, though. My Sunday best now consists of frayed jeans and a mustard stained shirt, the egg hunt has been replaced by an all day dart championship, and brandy-spiked sangria is the adult drink of choice. The food philosophy remains the same, however: Keep it simple, keep it Southern. A trip to the farmers’ market supplied fresh-from-the-farm chicken eggs, sparkly citrus fruit and glorious spring vegetables, while the menu still reflected a bygone era. Nothing but good old country cookin’ here, folks. Happy Easter!
BUTTERY DEVILED EGGS
Source: Adapted from Southern Living
- 1 dozen large eggs, hard-cooked and peeled
- 1/4 cup butter, softened
- 1/4 cup mayonnaise
- 1 tablespoon Dijon mustard
- 1 teaspoon fresh lemon juice
- 1/4 teaspoon ground red pepper
- 1 to 2 tablespoons cider vinegar
- Hot sauce, to taste (I like Cholula)
- Cayenne Pepper, to taste
- Salt to taste
- Ground white pepper, to taste
- Paprika (optional)
Cut eggs in half lengthwise; carefully remove yolks. Mash yolks; stir in butter and next 4 ingredients. Stir in salt, white pepper, vinegar, hot sauce and cayenne, to taste. Spoon or pipe yolk mixture evenly into egg white halves (we spoon it in where I come from – no need for the fancy pastry bag). Sprinkle with paprika, if desired. Cover and chill at least 1 hour or until ready to serve. YIELDS 2 dozen
BAKED HAM WITH BOURBON GLAZE
Source: Southern Living
- 1 cup honey
- 1/2 cup molasses
- 1/2 cup bourbon
- 1/4 cup orange juice
- 2 tablespoons Dijon mustard
- 1 (6- to 8-pound) smoked ham half
Remove skin and excess fat from ham, and place ham in a roasting pan. Baste with the honey mixture.
Bake on lower oven rack for 1 1/2 hours or until a meat thermometer inserted into thickest portion registers 140°, basting occasionally with honey mixture. Remove from heat and allow to rest for 20 -30 minutes. Bring drippings and remaining glaze to a boil in a small saucepan. and serve with sliced ham. Garnish with fresh herbs, if desired. YIELDS 12 -14 servings.
HARICOTS VERTS WITH WALNUTS & WALNUT OIL
Source: Adapted from Country Weekend Entertaining, by Anna Pump
- 1 1/4 pounds green beans, trimmed
- 2 tablespoons butter
- 3 tablespoons walnut oil
- 1/2 cup coarsely chopped walnuts, toasted
- Salt, to taste
- Freshly ground black pepper, to taste
- A squeeze of fresh lemon juice, to taste
- 2 tablespoons finely chopped fresh parsley (optional)
Bring a saucepan filled with water to a boil and blanch beans, uncovered, approximately three minutes (beans should be crisp yet tender). Drain and set aside.
Heat skillet over medium-high heat, then melt the butter. Add the walnut oil and walnuts, saute for 1 minute. Add the beans and saute for another 2 minutes or until the beans are coated and heated through. Add the salt, pepper, lemon juice and parsley. Stir well and serve hot.
PS – the Recipes for the sangria and strawberry shortcakes will have to come at a later date. They were ravaged before photos could document their existence. Oh well, guess that means I have an excuse to make them again!
Two weeks in a nutshell
April 9, 2009
I’ve been cooking. I promise. But what I’ve learned so far from this blogging project is that cooking is the easy part. The hardest parts are finding time to cook with good daylight, attempting to take photos before the food is ravaged, and then writing a witty post about my culinary masterpiece. Honestly, I am so impressed with certain bloggers out there who manage to post delicious recipes so frequently (if not daily), and with clever stories to boot. Props.
Well, I have had some good things coming from my kitchen, and I would hate not to share them with you. So here is a little food porn of some of my favorite recipes as of late. Enjoy!
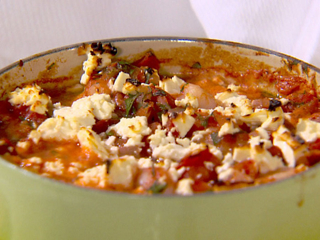
Image via Food Network
BAKED SHRIMP WITH TOMATOES AND FETA
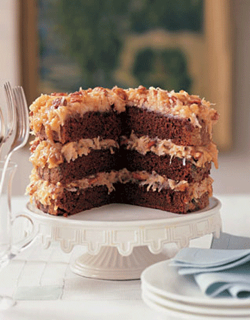
Image via Country Living
ORIGINAL BAKER’S GERMAN CHOCOLATE CAKE
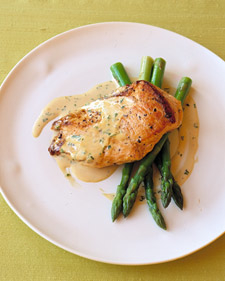
Image via Martha Stewart
Miss Verbena’s Pimento Cheese
March 31, 2009
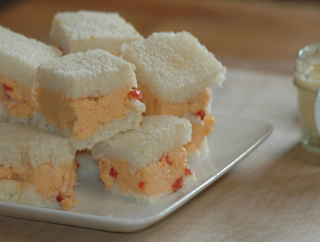
I do not have fond memories of pimento cheese. When I was a child, we always had a carton of the (unnaturally) bright orange, grocery store brand in the fridge, which my dad used to scoop onto everything he could get his hands on. Sometimes he would wave a sandwich smothered in the stuff under my nose, and I would run away screaming my little head off.
It wasn’t until college that I found an appreciation for this Southern staple. Every time my roommate Ben went home to Raleigh, North Carolina to visit his grandma, he would return with a vat of homemade pimento cheese…you know, the real thing. I didn’t even know it could be homemade – I had always assumed it could only be processed in a mysterious factory off the New Jersey Turnpike, along with Twinkies and Moon Pies. My roommates and I would stand around the kitchen slathering slices of Wonder Bread with the chunky spread and shoving it into our mouths, all while thanking our lucky stars for grandmas. (Classy, right?)
This recipe is from Frank Stitt’s Southern Table, a stunning cookbook from the chef at Birmingham, Alabama’s famous Highlands Bar and Grill. It is the perfect example of an authentic, incredible Southern recipe for pimento cheese. I went all out and made homemade mayonnaise as the recipe calls for, which is so incredibly delicious (and easy), that I can’t believe I don’t make it all of the time.
Serve pimento cheese as a dip at parties, or like every good Alabama girl does – on white bread. And dad, if you’re reading this, don’t be too jealous!
MISS VERBENA’S PIMENTO CHEESE
Source: Frank Stitt’s Southern Table: Recipes and Gracious Traditions from Highlands Bar and Grill
- 1 pound sharp yellow cheddar
- 1/4 pound cream cheese, softened
- 1 teaspoon freshly ground white pepper
- 3 large red bell peppers, roasted, peeled, seeded, and chopped (I used one 4-ounce jar of canned pimientos)
- 1/2 cup homemade mayonnaise (see recipe below) or best-quality commercial mayonnaise
- 1 teaspoon sugar
- Splash of hot sauce, such as Tabasco or Cholulu (I used more than a splash – we like it spicy)
- A few big splashes of worcester sauce
- 1/8 teaspoon cayenne pepper (optional)
Grind the cheddar in a food processor fitted with the grating disk, or grate it on the small-holed side of a hand grater. Transfer the grated cheese to a bowl, add the cream cheese, white pepper, bell peppers, mayonnaise, sugar, hot sauce, worcester sauce and cayenne, if using, and blend all together thoroughly. Refrigerate and serve chilled. (The spread will keep for several days in the refrigerator, but it usually disappears long before than.) YIELDS: 2 cups
HOMEMADE MAYONNAISE
Source: Adapted from On Cooking: A Textbook of Culinary Fundamentals
- 2 egg yolks, pasteurized, at room temperature
- 1/2 teaspoon salt
- White pepper, to taste
- 1/2 teaspoon dry mustard
- 1 1/2 tablespoons white wine vinegar
- 12 ounces salad oil (I used canola oil)
- Fresh lemon juice, to taste
(Note: this recipe is halved from the original)
Place the egg yolks in a large bowl and whip on high speed until light yellow and frothy. Add the dry ingredients and half of the vinegar, whisking to combine.
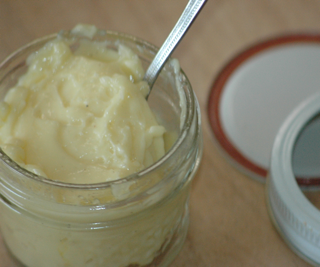
SLOWLY add the oil a drop at a time into the yolk mixture and beat at high speed until it begins to thicken and an emulsion has formed. Add the remaining oil in a slow stream, thinning the mayonnaise occasionally by adding a little vinegar. Continue until all the oil and vinegar have been incorporated. Adjust the seasonings and add lemon juice to taste. Refrigerate until needed (can be made up to 2 days in advance). YIELDS: 1/2 quart